
If you like laminate floor and want to have it in your home, you can try to install it! Sounds scaring? Oh, don’t be afraid! You can install wood laminate flooring in a weekend. It’s all because of snap-together fastening system that simplifies laminate floor laying. No glue, no nails. It’s so easy to install that you can lay a beautiful, yet durable hardwood floor in a weekend. It’s pre-finished too, so no dusty sanding and painstaking finish work. Read the article and see how to prepare your floor and then lay the boards. Be sure, this is a sort of DIY project you can cope with, even if you have no more than some simple carpentry skills.
Minimum Tools You May Need to Get the Job Done
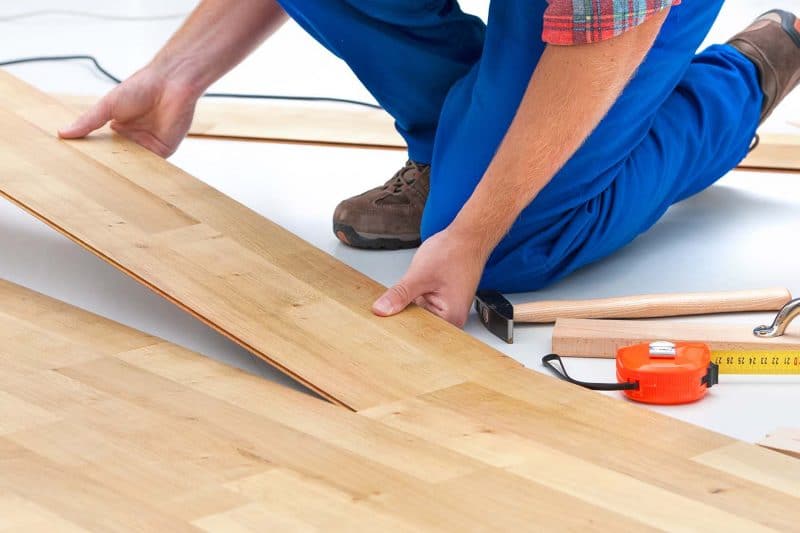
Of course, if you are professional, you can install laminate flooring without any tool. But still, you’d better have something for help. The tools you may use for installing laminate flooring are similar to snap-together plastic laminate floors. By the way, the 5/16-in. thick flooring has specially shaped tongues and grooves that interlock to form a strong tight joint without glue or nails. Once assembled, the entire floor “floats” in one large sheet. You leave a small expansion space all around the edges so the floor can expand and contract with humidity changes.
The cost of wood laminate floors (often called engineered wood floors) varies. It mostly depends on the species and thickness of the top wood layer. There are a few types of snap-together floors but you can pick the best variant from your local flooring retailer. It is also possible to buy flooring online!
So, if you want to make the best choice ever, you should draw a sketch of your room with dimensions. Ask your salesperson for help choosing the right transition moldings for these areas. You’ll need a few special tools in addition to basic hand tools like a tape measure, square and utility knife to know how to install wood flooring. A table saw and power miter saw would make your how to install laminate floors job easier but aren’t necessary.
- Prep the Room First
Make sure your floor is dry. Don’t install wood laminate flooring over damp surface or damp crawlspaces. Check it for excess moisture. It’s not a difficult to do with the help of the plastic mat test. One more thing, professional installers don’t advice to install wood laminate flooring in all areas where they might be subjected to standing water.
Then prepare your room for the new laminate flooring installation. Make sure the existing floor is smooth and flat. You can clear the old floor and smooth it by scraping off lumps and sweeping it. If you have wood floors, now’s the time to fix squeaks and tighten loose boards by screwing them to the joists with deck screws.
- Roll Out Underlayment and Seal Together
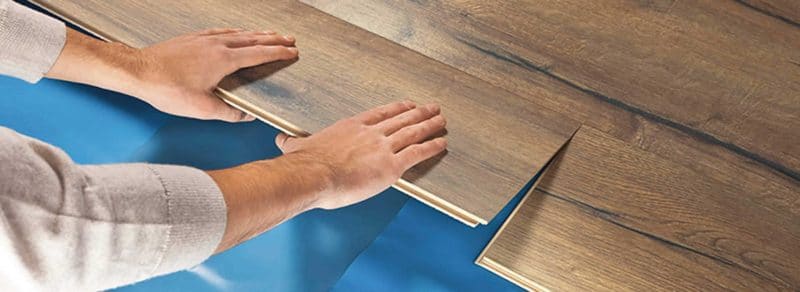
It is always recommended to put down underlayment before laying the laminate. Why? This thin foam helps to absorb sounds; provides a thermal barrier; makes it easier to walk on the laminate, and helps the flooring bridge minor gaps and bumps. Underlayment is always a default choice. However, if your subfloor is flat and will always remain as dry as a bone, underlayment is not needed.
- Laying the First Row of Laminate Flooring
Cut the tongue from the wall-side boards with your circular or table saw. Begin your first row along the longest wall, with the former tongue side against the wall. Start on the right side and work leftward. Otherwise, planks will stay in place well enough without spacers. After you have a few rows down, the flooring will be so heavy that it won’t slide.
You may consult flooring instructions for having some recommendations about expansion gap widths. Most guides tend to overstate the width needed. If your gap width is too much, you will end up causing yourself frustration down the road when you install baseboards.
- Laying the Floor: Move Cut Piece to Next Row
Once you reach the end of the first row, the last plank will be too long. Measure the length needed and transfer that measurement on a full-size plank, measuring from the right to left side. This is important so that you don’t cut off the tongue end of the plank. You want to preserve the tongue so that it will lock into the end of the first row. The cut-off piece will get shifted to the next row down.
- Laminate Plank Layout Process
This diagram shows the process for laying your laminate floor. Moving from right to left, your last row piece will always be cut off. That cut-off piece will be shifted down to the next row, moving it all the way to the right to start that row. You can find the picture in the internet to check it out. Pay attention!
Stagger Your Laminate Planks
Your rows of laminate planks should have this type of staggered, sawtooth appearance. Seams in one row should never meet up with seams in an adjacent row because this is structurally unstable. It’s possible to keep cut pieces no less than 16 inches long. If you have a good, stable, flat subfloor, you can probably push this length down to under a foot-but only in a pinch, no more.
- Tilt Planks at 45 Degree Angle to Place Them
Laminate planks, the most of the modern brands, often have a locking mechanism that requires you to first tilt the board up at around 45 degrees. It’s easy to do! You’ll feel the plank ever-so-minutely shift into place into the lower plank.
- Close Up Shows Gap in Laminate Planks
Laminate is one type of flooring where gaps between planks are anathema. If you want to make your laminate stable to water damage you will need to seal this off by making sure the planks are tightly fitted. If you have a gap, the reason is almost always because you hadn’t tilted the plank up high enough in the previous step.
As you can see, it is not a problem to install wood laminate flooring with your own efforts. Unlike porcelain or ceramic tile, laminate installs dry (no grout, no mortar) and does not need difficult cutting with a special saw. Unlike solid hardwood floor, that needs to be nailed down. Laminate installation is much like putting together a large puzzle. There is no reason why you should not be able to install one room in one day. Try!
Leave a Reply