
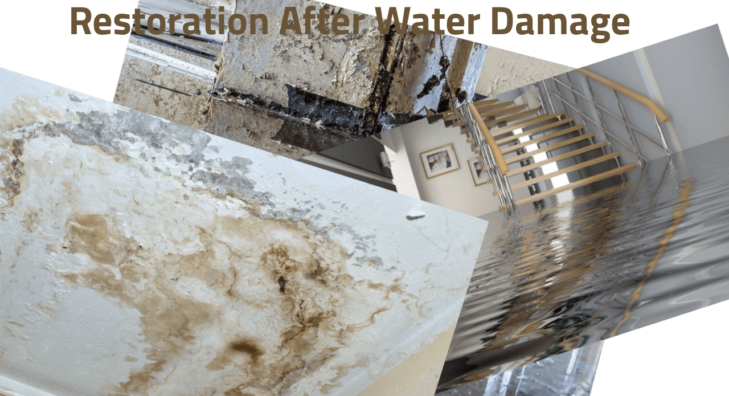
After your business experiences water damage from a leaky pipe, rainstorm or flood, you naturally want to get things back to normal as soon as possible. It is naturally. As far as you cannot take the time back, you need to find the way out. So, the disaster is near here. What is the full size of the water damage?
 If you’re dealing with anything other than a large incursion, you understandably may be considering handling the cleanup and drying yourself to save money or time. The problem is that restoration after water damage isn’t always as straightforward as it seems. So, here are 3 key things you need to be aware of when addressing water damage from a minor clean water (or Category 1) incursion.
1) Know What You’re Dealing With
The water damage can be caused by three different types of water, including:
Clean water (Category I)
Gray water (Category 2)
Black water (Category 3)
It’s important to understand the differences because Category 2 and Category 3 water present health risks to your employees and customers and need to be handled differently. The most likely sources of clean water would be water from a pipe, water heater, steam lines or even rainwater. The basic rule of thumb is that it should look and smell like tap water.
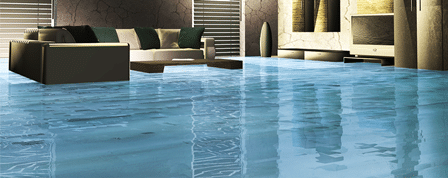
Recovering from Category 2 or Category 3 water damage or heavy flooding involves additional considerations that you shouldn’t do on your own.
2) Make Sure You Investigate All of the Damage
An important thing about restoration after water damage is finding the reason of it. Check the room to find something like a broken pipe or rainwater incursion. Usually, you can typically only see a small part of the actual damage. The majority of the moisture is often hidden in walls, and it’s critical to identify and dry all of the affected areas to prevent mold.
The methods for dealing with damage to walls depend on the type of materials and also what’s behind those materials. Drywall can often be salvaged, when you respond quickly to damage. If the wall has insulation, you will need to use flood cuts. If there is no insulation, then usually the best method is to create weep holes. You also need to pull and check your base molding and flooring materials. If you the floors are carpet, you may be able to pull back the wet area and dry it.
3) Establish Proper Airflow and Keep the Windows Closed When Drying
If you’ve found the moisture, your first instinct may be to open windows to help with the drying process. It is wrong. For example, if your building is mechanically ventilated, the systems need constant pressure levels to work correctly. You also want to avoid excess coolness or heat and humidity, or you may end up complicating the drying process.
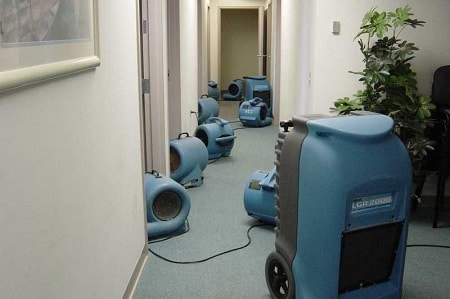
Once you’ve taken away wet materials and established holes or cuts in the wall as needed, you’ll typically need one air mover for every 15 – 25 square feet of floor, unless the moisture load and density is particularly high, then you may need more. To prevent mold, make sure all of the layers and materials are dry before putting everything back together. You can take drying equipment for rent or call for professional cleaners. It is all about mold. It can be dangerous in case you’ve missed something.
The Process of Professional Water Damage Restoration
If the water damage has already happened in your house, you know how devastating it can be. If you’ve been trying to fix the situation on your own but there is no result, you need professional restoration after water damage.
Assessment and Inspection
The first thing that a restoration company will do is come to look at your flooded home. They will assess the water in your home or business and determine how much damage it did. It’s important to let professional water damage restoration company work in your home. Whether you have flood damage or a water pipe break, you may need more work done that you had thought. Parts of your building may need restoration and mitigation beyond what you can see, and professionals know how to assess these types of damage, too.
 Getting the Water Out
The first step of water cleanup from flood damage or a water supply line break is to get the water in your home out. This means thoroughly drying out everything that got wet: flooring, walls, and even the foundation or the ceiling. The water cleanup process usually starts with vacuuming up as much water as possible. After that, the restoration company will work on drying up the water in your business or your home.
Cleaning Your Building
When you get water in your business or your home, whether it’s from a supply line break or is flood damage, you will need to clean everything affected by the water. Not only will it look dirty, but water can carry bacteria that you don’t want to keep around!
This means that, after drying, the next step in water mitigation is thoroughly cleaning anything that got wet. Your water cleanup restoration people will treat your carpets and walls with agents designed to kill all sorts of microbes. Depending on where you had water in your home or business, they may also use agents that will clean the air, so you can feel sure that you are breathing safely.
Finishing the Restoration
Once your water cleanup is complete, it’s time to restore your building. The process of restoration after water damage directly depends on the extent of the damage. If your flood damage as from a pipe break or a supply line break, you will need to be sure that your pipes are repaired, so you don’t face similar issues down the road. After all, you don’t want water in your business or home again! It’s important to make sure worthwhile to make sure that the work is completely done and your house is in safe.
Leave a Reply